

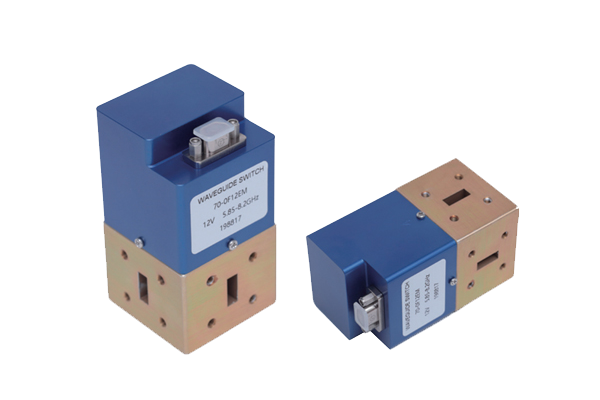


How to debug a newly installed waveguide switch
Waveguide Switch Debugging Procedure
Debugging a newly installed waveguide switch requires systematic checks to ensure optimal performance.
1 Physical Connection Inspection
Verify all mechanical connections before powering the system.
Critical checks:
- Waveguide flanges properly aligned and secured
- Bolts evenly tightened to prevent signal leakage
- O-rings inspected for damage or wear
- Gaskets correctly seated for airtight sealing
Note: Proper airtightness is especially critical for high-frequency systems (>18 GHz) where even minor leaks can cause significant performance degradation.
2 Basic Functionality Test
Power on the control system and verify operational fundamentals.
Verification steps:
- Toggle switch between states using control interface
- Monitor for smooth mechanical movement (no jamming)
- Listen for unusual grinding or clicking noises
- Confirm indicator lights/digital readouts match selected state
3 Signal Performance Testing
Conduct quantitative measurements of switch performance.
Signal Generator Power Meter Oscilloscope Network Analyzer
Key measurements:
- Insertion loss in "on" state (should be <0.5 dB)
- Isolation in "off" state (should be >60 dB)
- Switching speed (measure with oscilloscope)
- VSWR across operating frequency band
4 Extended Stability Test
Verify long-term reliability through continuous operation.
Testing protocol:
- Run continuous 24-hour cycling test
- Monitor for performance drift or inconsistencies
- Record minimum 1000 switching cycles
- Check temperature rise during extended operation
Troubleshooting Tip: If measurements deviate from specifications, recheck all connections and recalibrate the control system before considering component replacement.